Installation & removal guide
before you start
this mount requires drilling a small hole, so check for any electrical wiring or plumbing behind the wall before you start.
the screw mount is recommended for supporting figures up to 1.5 lbs (24 oz).
how to install
1. position the mount
place the wall mount against the wall at your desired height. i recommend using a small leveler or marking your spots in advance.
2. drill the mount
place the wall mount over your marked spots. insert the screw through the mount and drill it into the wall. avoid over-tightening, as this could crack the plastic mount if your drill settings are very high.
3. attach the holder
slide the doll holder onto th ewall mount. you should feel it seeted securely into the groove.
4. mount your doll
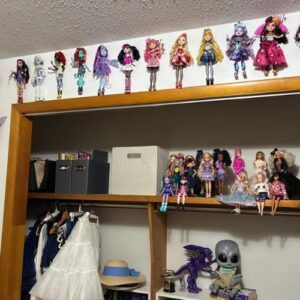
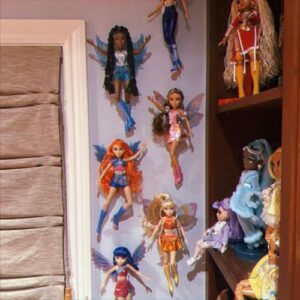
place your doll into the support. because the doll dock is modular, you can swap different holders into the same wall mount if you decide to change which doll you are displaying.
how to remove
to protect your wall and the doll dock itself, do not pull the mount directly off the wall.
1. slide the holder out
remove the doll and slide the doll holder upward and off of the wall mount.
2. unscrew the mount
use a screwdriver or drill to remove the screw from the center of the mount. once the scerw is out, the wall mount will come away from the wall.
before you start
for the strongest bond, ensure your wall is surface clean and dry. the adhesive doll dock mount works best on smooth surfaces like painted drywall, finished wood, tile, and glass. it is not recommended for use on highly textured walls or wallpaper.
the adhesive mount is recommended for supporting figures up to 1 lb (16 oz).
how to install
1. prep the surface
Wipe the area where you plan to mount the dock with a damp cloth or rubbing alcohol to remove dust and oils. Let it dry completely.
2. position the wall mount
Peel the liner off the adheisve strip on the back of the Wall Mount. Press the mount firmly against the wall for 30 seconds.
3. set the adhesive
for the rest results, wait about an hour before adding the weight of a doll. this allows the adhesive to funny bond to the surface.
4. attach the support arm
slide the doll holder onto wall mount. you should feel it seat securely into the groove.
5. mount your doll
place your doll into the support. because the doll dock is modular, you can swap different holders into the same wall mount if you decide to change which doll you are displaying.
how to remove
to protect your wall and the doll dock itself, do not pull the mount directly off the wall.
1. slide the holder out
remove the doll and slide the doll holder upward and off of the wall mount. you should now have easier access to the adheisve tab.
2. slowly pull the tab
hold the wall mount gently with one hand (to prevent it from snapping). with your other hand, pull the tab straight down toward the floor. keep pulling and stretching the strip slowly against the wall until the mount releases.
important: do not pull the tab toward you. pulling straight down stretches the adhesive, allowing it to release without peeling the paint or leaving residue.
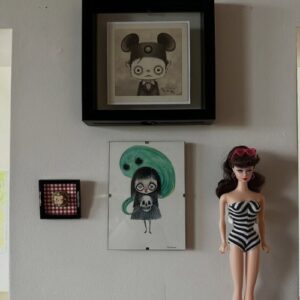
ready to
show off your collection?